So I taught the first session of that photography workshop at the d.a.i. on Saturday, and I’m pleased to report it went well.
The class was full – oversubscribed, even, with 17 people signed up to listen to pointers on how to take better photos with any kind of camera. Any kind of digital camera, that is – I may have started doing photography with film in my youth, but it’s all digital, all the time for me now.
Anyway, my idea for the workshop is to explain how you don’t need a fancy camera and/or a mastery of all the manual settings for f-stops and shutter speeds in order to take more interesting photos. Rather, if you know a little bit about what the built-in “Scene” Modes really are trying to automate for you, you can utilize them to your advantage when taking all kinds of photos you might not realize. And once you feel you have a command of the basics of your camera, then you can start to have more fun with photography.
Well, that was the course description in a nutshell. 😉
So, for example, cameras typically have a “Landscape” or “Scenery” mode built-in. The symbol is usually (perhaps always?) a graphical symbol that’s supposed to suggest mountain peaks:
However, by choosing Landscape scene mode on the camera, you’re telling the camera that you want everything that is off in the distance to be in focus. That works when taking photos of mountains, to be sure. But, that also works for taking a photo of a building just down the street:
Think of that building as a “landscape” and choose that setting on your camera. Then, the building, and most everything around and beyond it will be in focus, which is usually what you want when taking a photo of a building like that.
Now, I say most everything with be in focus, because if you look closely, you’ll be able to spot the Friendly Tourist walking across the street from right to left. He was in motion when I snapped the photo, and therefore not in focus. Landscape mode doesn’t handle motion – after all, mountains rarely move. 😉
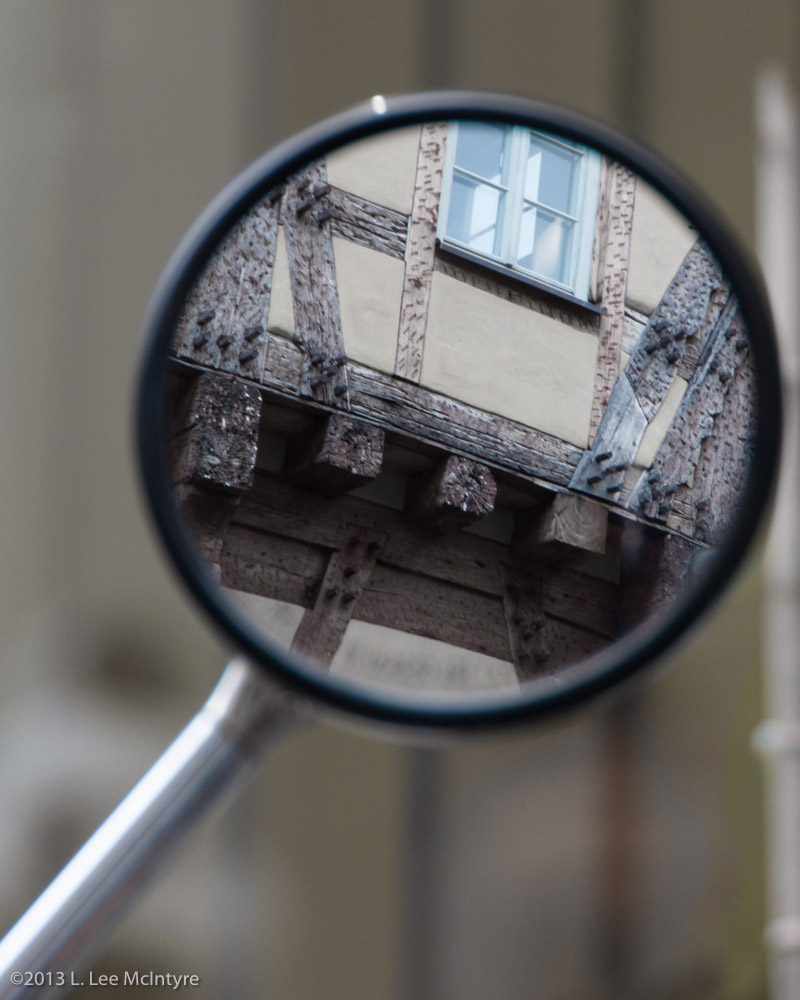
Anyway, a further trick is to realize that whenever you’re looking at a building, even if it’s a reflection of a building in the rear-view mirror of a moped across the street, the building is still far away from you, even if the mirror itself is not:
So, in that mirror, we need to treat the reflected Burgeramt building as a landscape — just like we did in the first photo — in order for it to be in focus in the mirror. Anything that’s around Burgeramt in the reflection would be in focus, but the edges of the mirror itself, and the building that’s physically behind the mirror, would not.
This is an oversimplification of what’s going on. But I think it’s enough to know that you can use landscape mode to treat a mirror like a “mountain” order to get a reflected image in focus.
Remember, the workshop is not about fun with physics fundamentals – it’s all about having fun with photography. 🙂


Thanks for the tip. I never used the landscape mode so now with the idea that it could sharpen the focus of something far away maybe I will try it!
Thanks, Stan! Hope you find that tip helpful — I’ll look forward to seeing some of your photos taken win “Landscape” Mode. 🙂
This was not quite as good as being in the actual class — but much more convenient! I’m hoping you’ll write up some more of the tips for those of us stateside.
Thanks, Dovie! You just need to find me a sponsor to pay me to conduct the workshop in a city near you, and then you can attend in person. 😉
As I said to Stan, I’ll look forward to see some of your “Landscape Mode” photos. 🙂